I've been re-searching a bit for MFD options, i know that it can be coded out with VCDS, that's not the problem, problem is the button/switch on stalks. But digging a a bit on the forum i have found this.
https://www.aliexpress.com/item/32577003507.html
Witch is basically a button and two wires and that is pretty easy to source ( and cheap)
But I don't understand their instructions at all.
Multifuction Instrument Cluster upgraded Kit for VW VOLKSWAGEN POLO JETTA SANTANA SKODA FABIA RAPID
PACKING LIST : 5053 + 2 Switches with cables
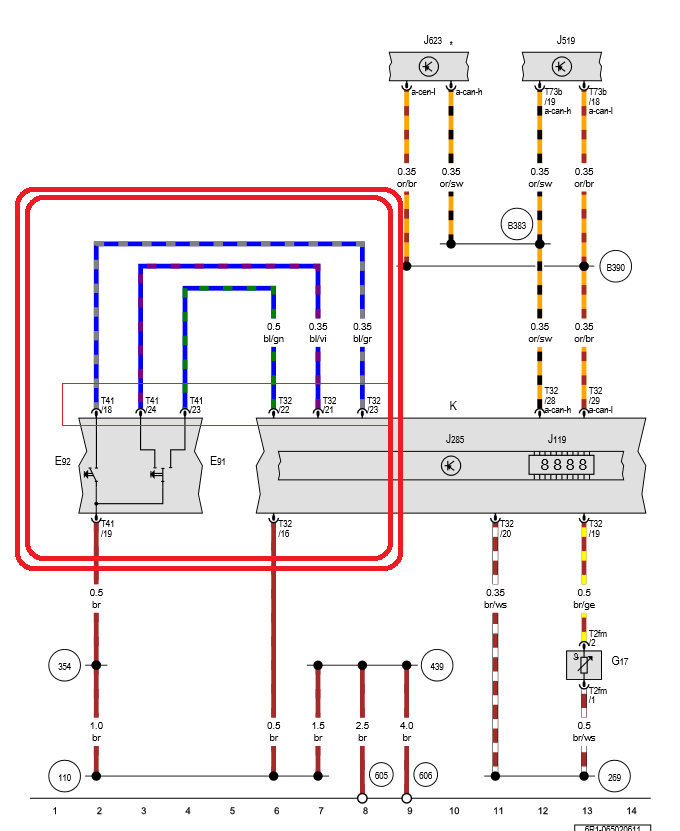
All Low version cars can be upgraded. It can be installed easily, do not need to disasembled the sterring wheel, just remove the instrument cluster! Found 21 meter insert 32-pin plug on the line! 21 is on the turn 22 next turn 23 is reset! We can plug in a 21 cycle flip it! Then brush with 5053 computer code, into the original coding 140200 17 dashboard can be changed 140A00
But I don't understand their instructions at all. Can someone explain and maybe check if this could be done ( in ELSA via circuit diagram ?)
So pin 21 is (nex next function for board ?) /// Basically one wire from switch to pin 21, other to ground ?
Pin 23 is Reset / OK - This would require another switch - but in my case i wouldn't need this option
What i found:
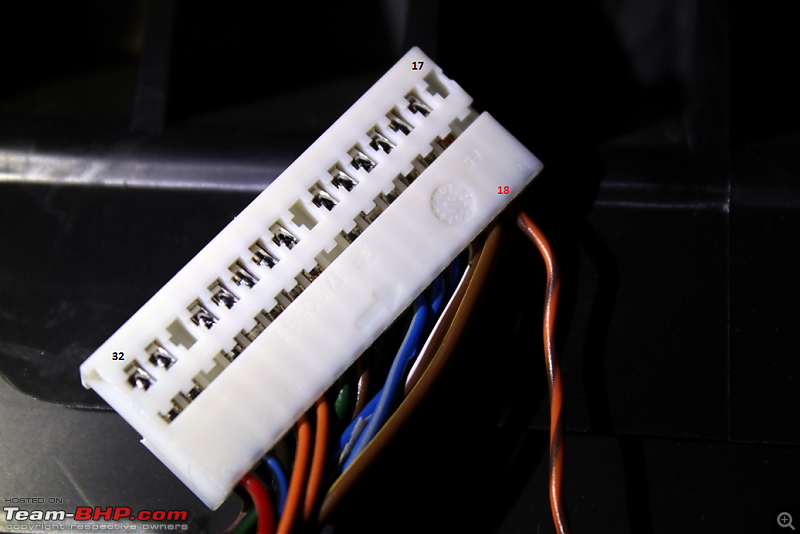
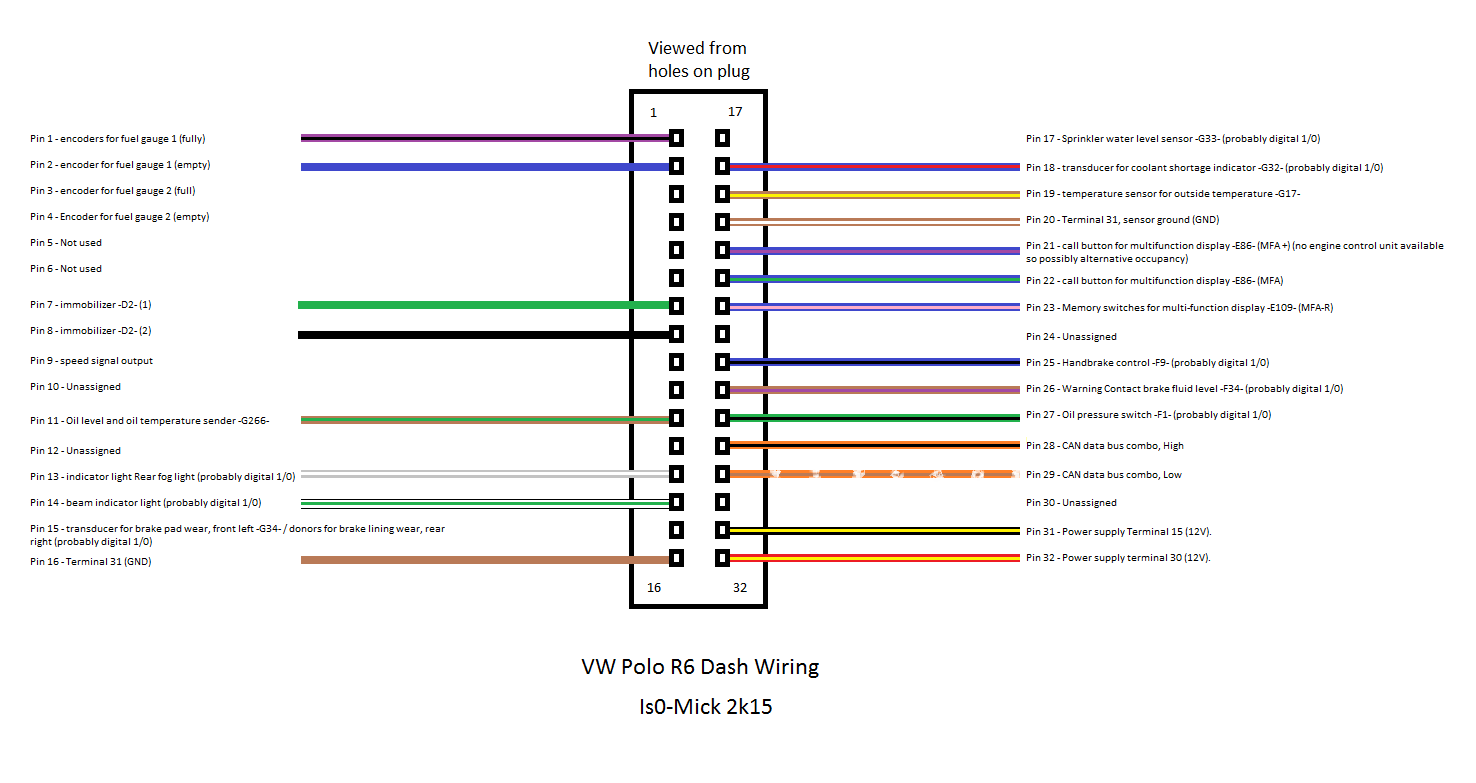
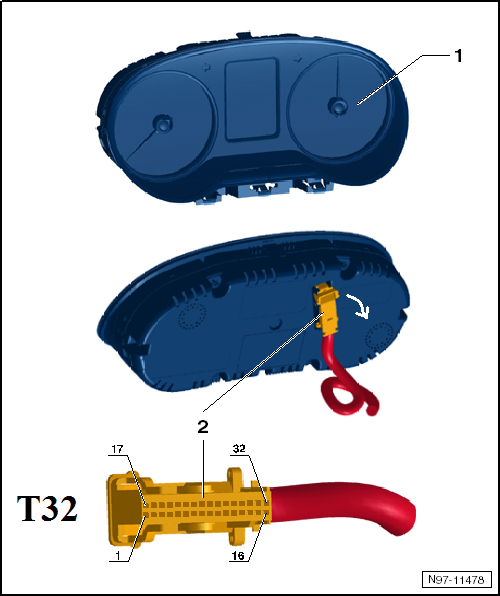
Cluster pinout:
Than this topic:
viewtopic.php?t=66992
viewtopic.php?t=65096