Air con not working right? Replace the V68 motor - HOW TO.
Posted: Sun Apr 10, 2011 11:05 pm
A common problem on the 9n Polo is the V68 motor playing up. The main symptom is the blower doesn't blow air at the temperature you've selected. It usually blows hot air when it's set to cold. Restarting the car, or turning the thermostat from fully hot to fully cold can cure the problem momentarily, but it'll soon start to play up again.
This can end up being a very expensive job at the dealer. Many say this is a dash out job. This guide disproves that and will show you how to do it less than a couple of hours. Before you start anything, make sure your ventilation is at the coldest setting, and then turn it off (blower at “0”).
Before you rush out and buy a new V68 motor (they are £100+), jump to my post below this and attempt the "pikey fix". All you need is a £3 can of contact cleaner and about 20 minutes.
Replacing the V68 motor and VCDS adaptation
Tools required:
T15 torx screwdriver
Flathead screwdriver
Replacement v68 motor 6q0 907 511 - £103 + VAT
Replacement bracket* 6q0 820 892 - £4.40 + VAT
Junior Hacksaw*
VAG-COM / VCDS
*only needed if you snap the clip of the original bracket. See step 13.
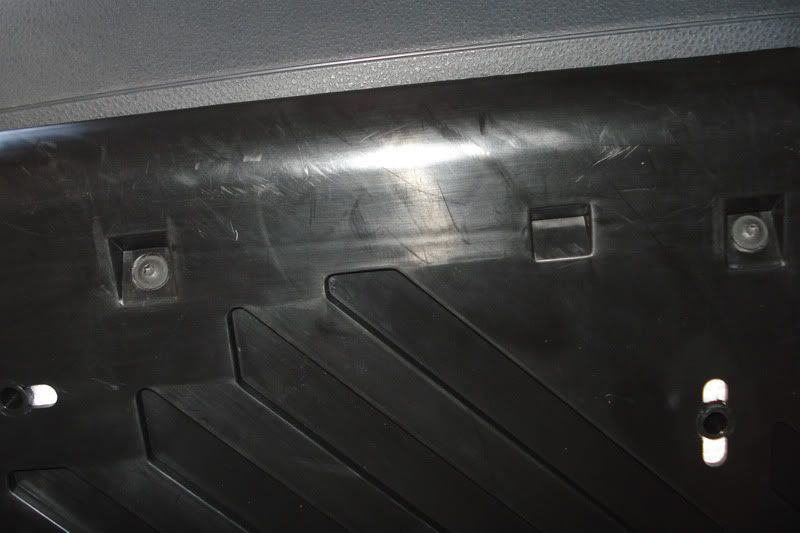
1. First of all, you have to remove the passenger side lower dash. In the passenger footwell, look up and you’ll see this piece of trim that covers the pollen filter housing. Remove the two torx screws and pull the trim piece off.
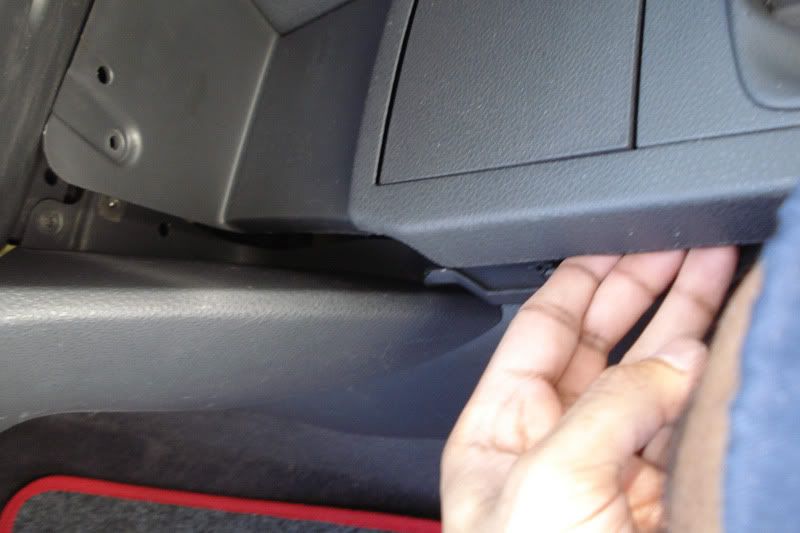
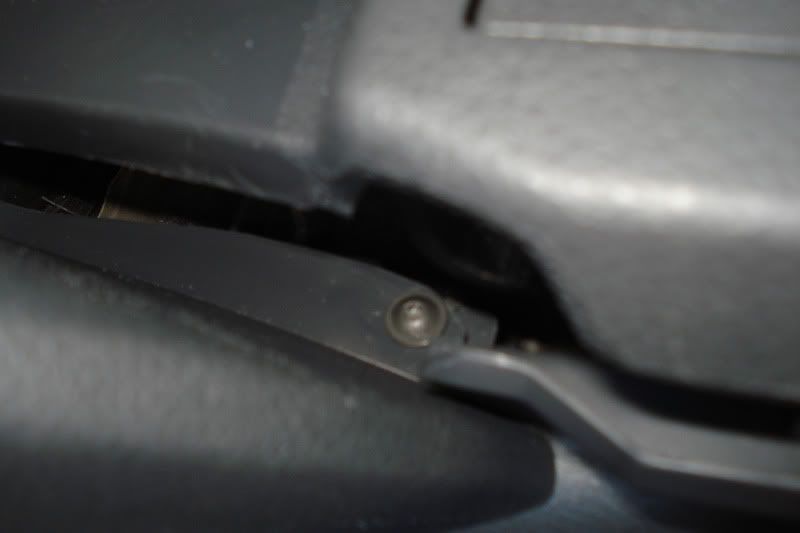
2. There’s a flexible plastic trim piece in front of the gearbox and immediately under the heater controls.

This simply pulls off.
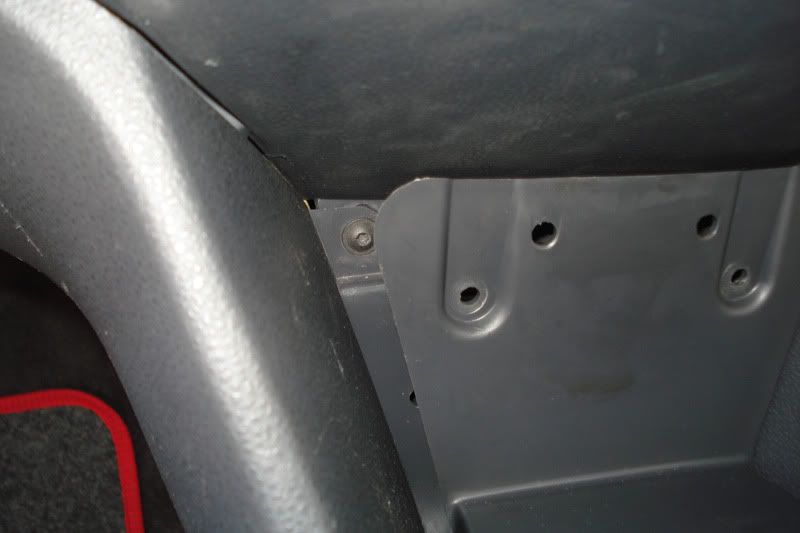
3. Unscrew the two torx scews.
4. Now, you can pull up the piece of trim surrounding the gear lever. It’s simply clipped in. Grasp it at both sides and pull it upwards and then towards the rear of the car. You don’t need to remove it completely.
5. There are two torx screws that have to be removed. One directly below the heater controls and one which is under the ashtray, or thereabouts.
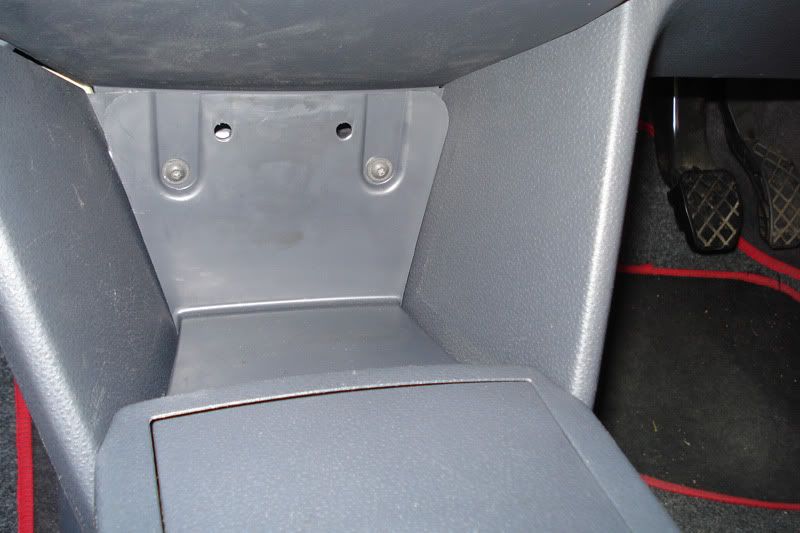
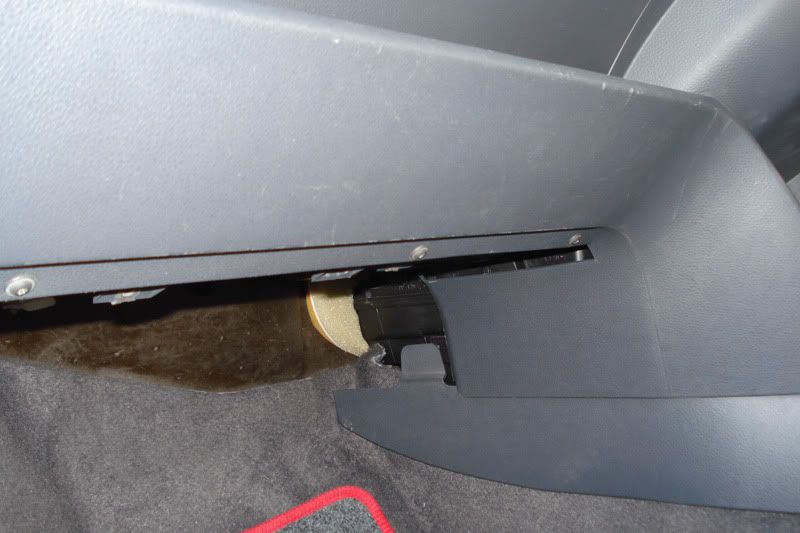
6. Now, look at the underside of the “shelf” in front of the glovebox. Unscrew the 3 torx screws.
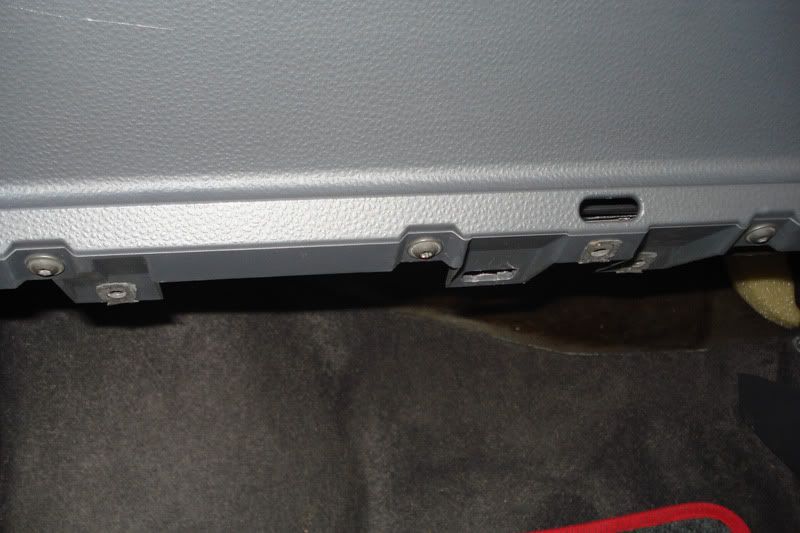
7. The shelf can now be removed completely. Take it out and put it somewhere where it won’t be in the way. With the shelf out of the way, 3 torx screws that secure the bottom of the glovebox are now visible. Unscrew them.
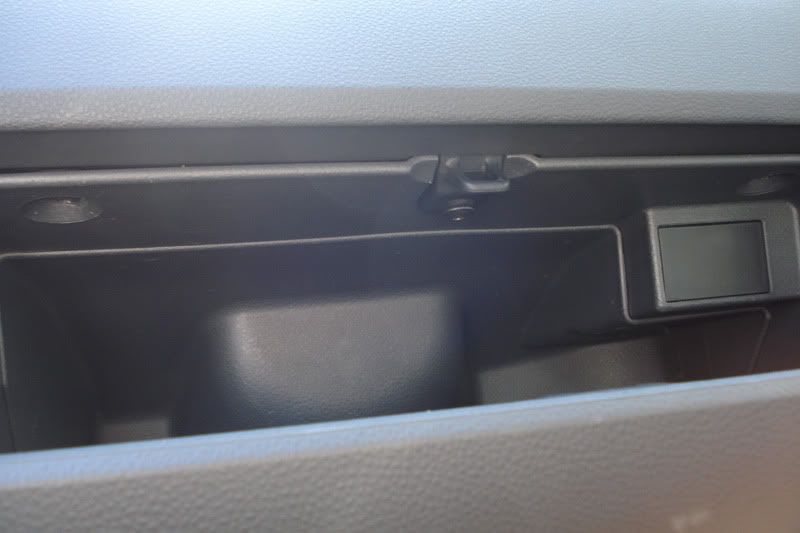
8. Open the glovebox. Unscrew the three torx screws securing the top of the glovebox to the dash. The torx screw in the middle holds the catch for the glovebox door and is slightly longer than the remaining torx screws.
9. The glovebox is still pretty secure. You can’t make it out too well in this pic, but there are wo small slots on either side of the top of the glovebox.
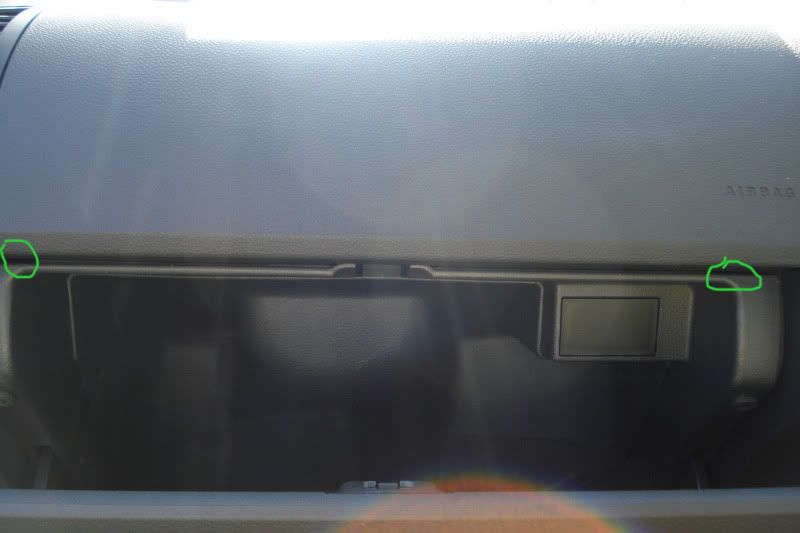
Get a cloth to protect the plastic and use a flat head screwdriver to wedge the glovebox out.
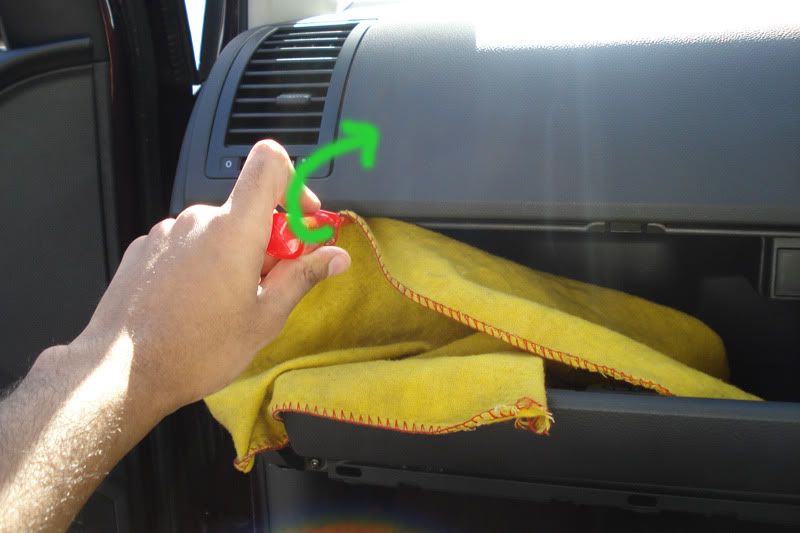
The glovebox can now be removed completely.
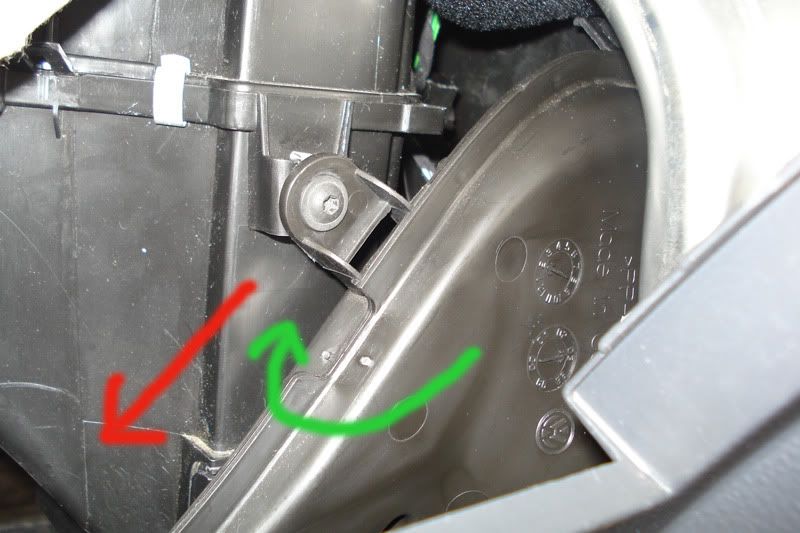
10. With the glovebox out of the way, the passenger side footwell vent is visible. Unscrew the single torx screw that secures the vent to the blower assembly. To remove the vent, grasp it at the bottom and rotate the vent clockwise (green arrow) and yank it in the direction of the red arrow. It may feel like you’re about the break it, but you have to put some effort into it. Even with the torx screw removed, it’s still clipped in quite well.
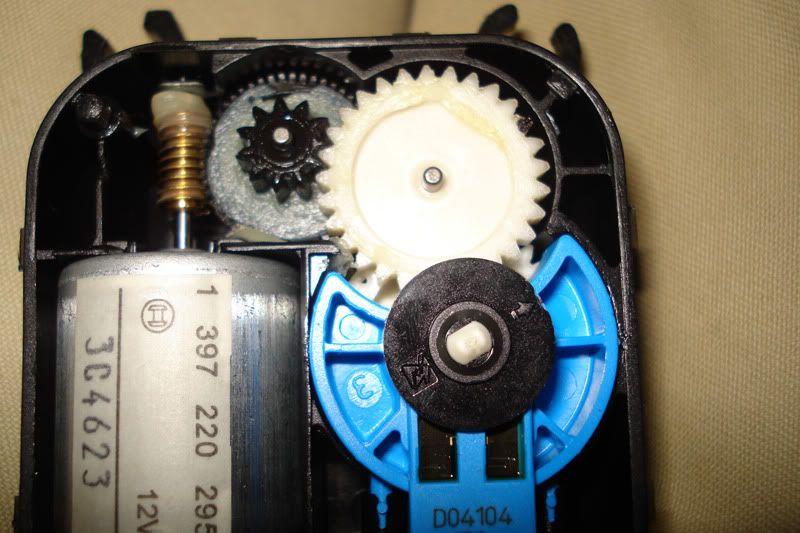
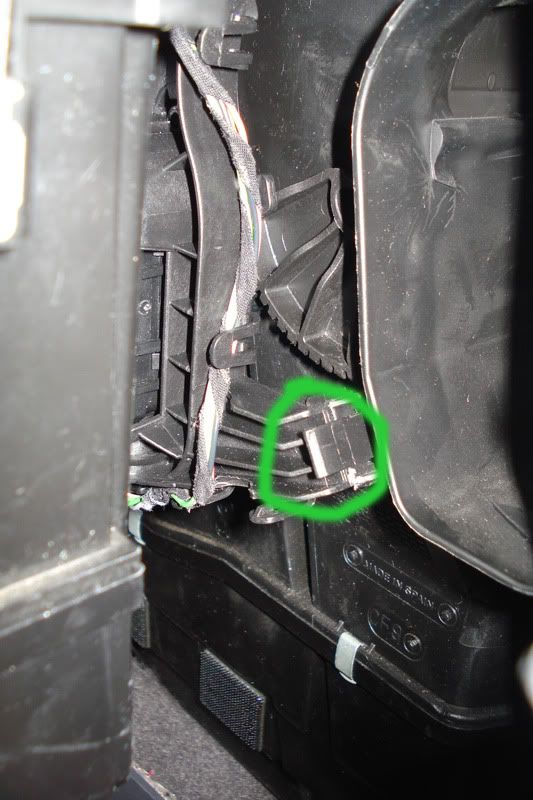
11. With the vent removed, the motor itself is now visible. It’s held in place with a single clip. Unclip it and remove the purple plug at the bottom. It’s a bit fiddly as the wiring is clipped in to the motor housing. There’s no way of explaining how to free the wiring, but if you got this far, you’ll figure it out. Took me a couple of minutes at most.
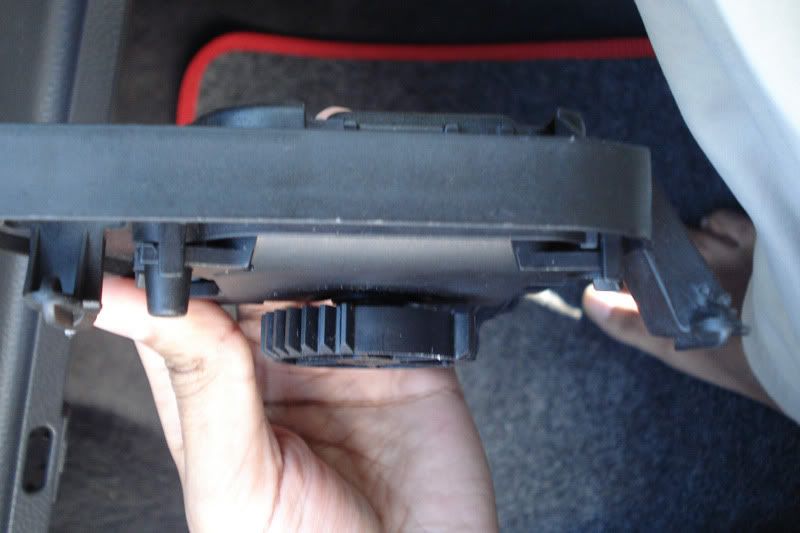
12. Remove the motor and bracket.
13. The motor can be wedged out of the bracket using a flat head screwdriver. Now, I was a bit of a plonker and managed to snap the clip of the bracket. If you managed to get away without breaking this, ignore this step. However, it is quite easy to break the clip.
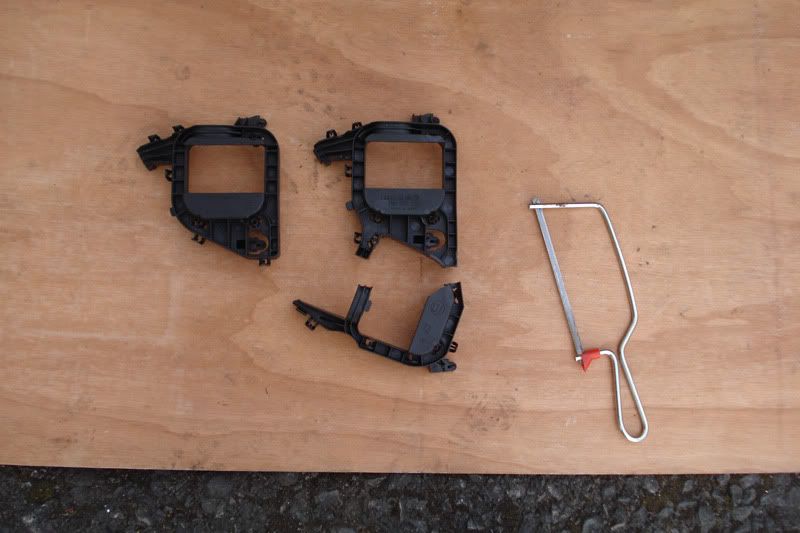
If your car had manual air con (climatic), you may have had a small bracket with space for a single motor (strangely, it has no art number printed on it). It appears this bracket has been discontinued and they only produce the bracket which was used in cars with the digital climatronic air con (6q0 820 892). This is twice the size of the other bracket as it also holds in the V168 defrost flap motor.
Original bracket on right, bigger bracket in the centre and motor on the right


Obviously, if you have climatronic, you need the bracket for two motors. Whilst the bigger bracket will also fit cars with climatic, it’s quite fiddly as there’s not much room behind the dash and towards the top, it’s extremely tight with a wiring loom for the blower motor in the way. So, get a hacksaw and do this:
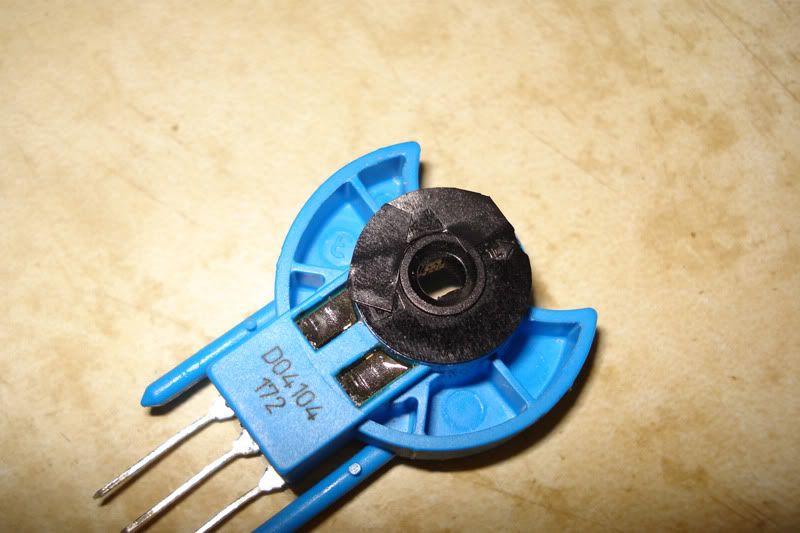
14. Clip your replacement (or "pikey fixed") motor into the bracket. Note the two protrusions on the bracket.
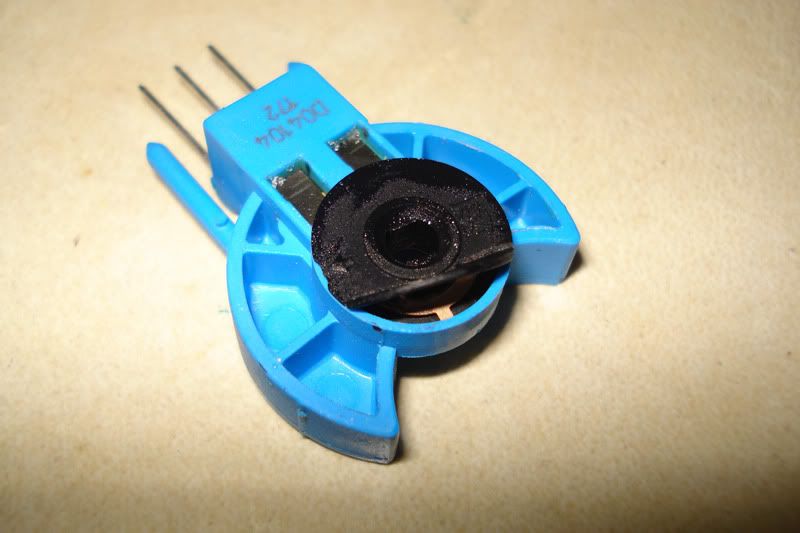
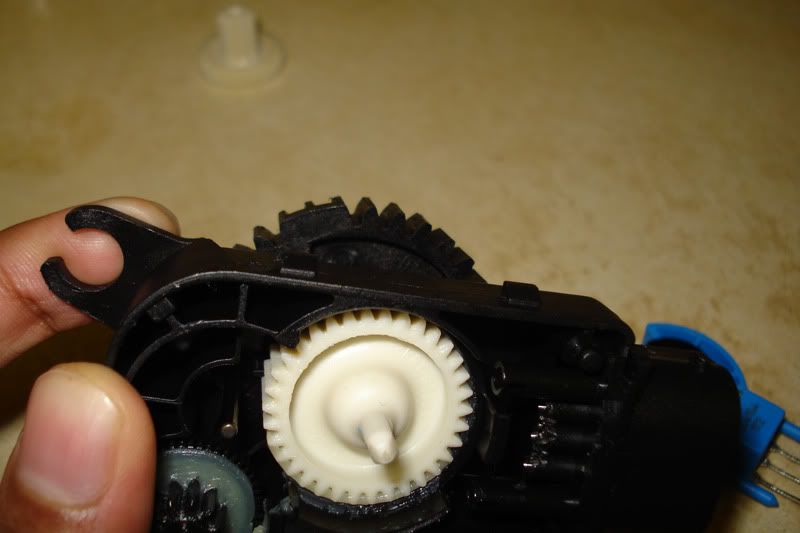
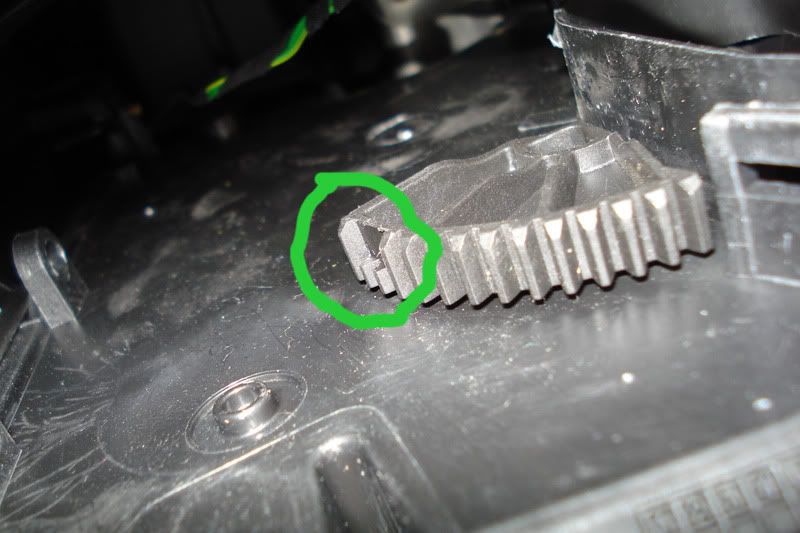
15. Now, note the “double teeth” on the cog as highlighted below.
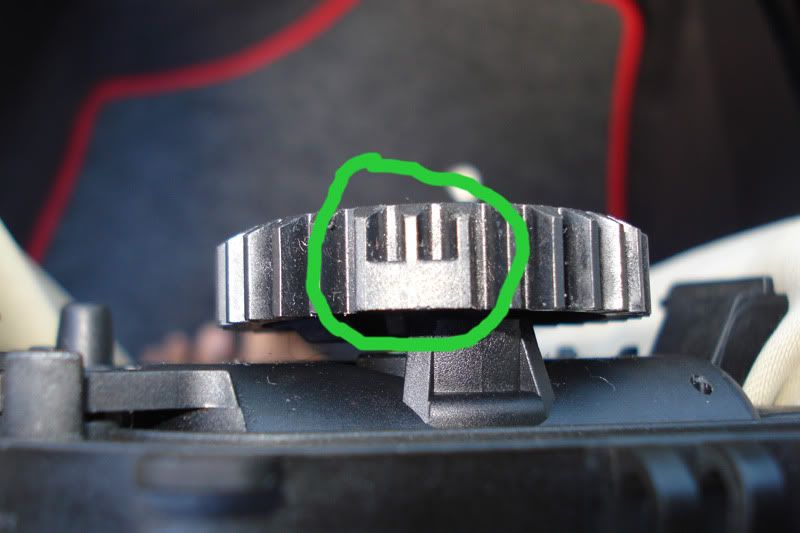
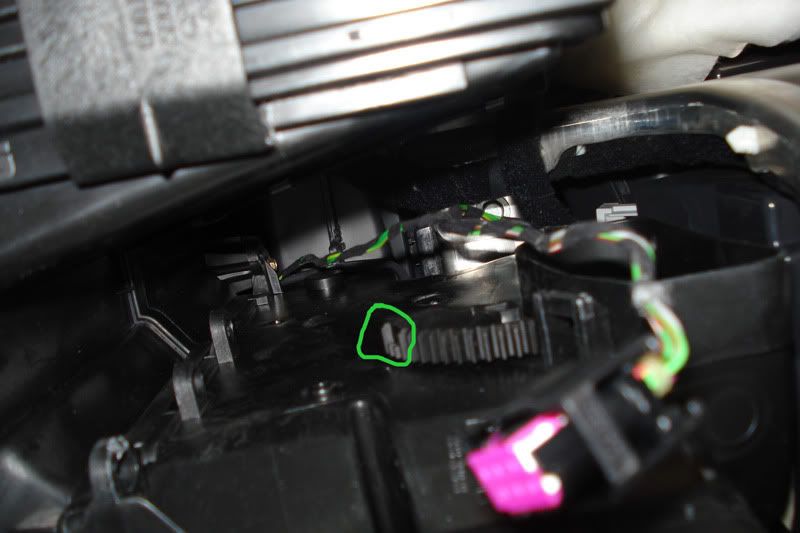
If we look at the temperature flap itself, you can notice this has “double teeth” as well.
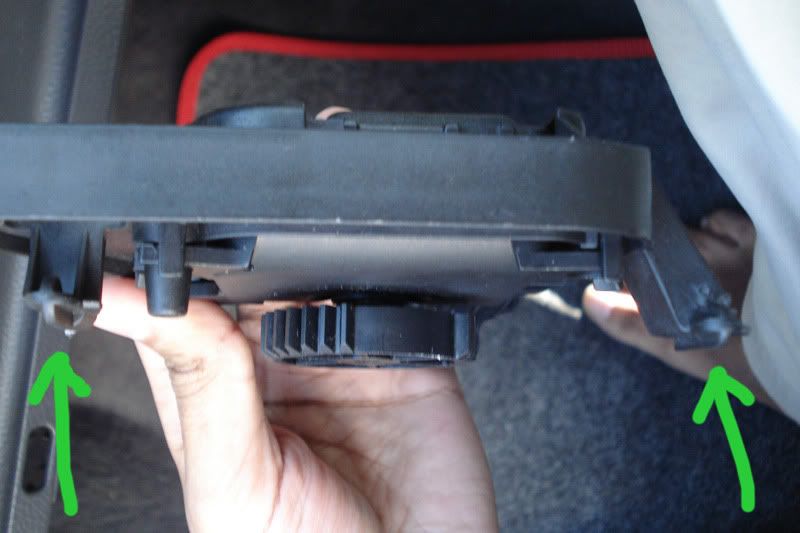
16. The protrusions in the motor bracket (step 14) go in these locating holes found in the blower assembly:
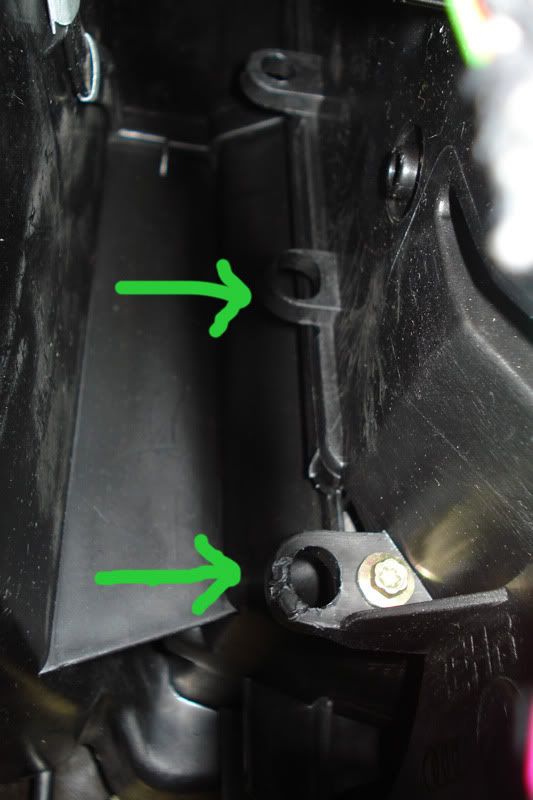
The hole at the top is used for the larger bracket (or non pikeyed one…)
Reattach the purple connector to the motor. Check the orientation, it only fits one way. Now, align the bottom bracket protrusion with the lower hole in the blower assembly and use this as a lever, pushing towards the firewall and the other protrusion should locate into the top hole.
17. Now, locate the “double teeth” on both the flap and the V68 motor and align them. The flap and motor should then fit snugly into place. In my case, the motor was in the position where the flap is fully closed (coldest setting). This corresponds to the position of the flap without the motor in place. I had to gently pull the flap towards me a little (there’s only a little give, be gentle) and then pushed the cog of the motor on.
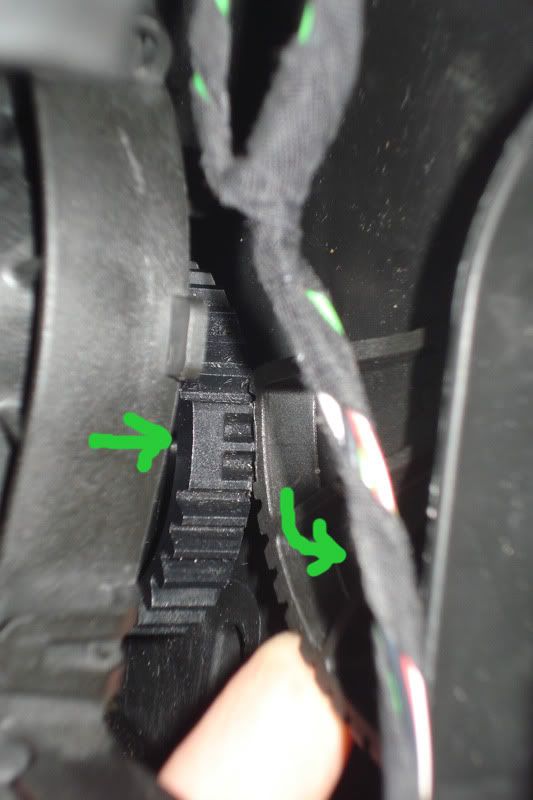
This may not be the case for you, but as long as you align the “double teeth”, you’ll be fine.
18. Clip the motor bracket back in and tidy the wiring up, ie, secure it using the clips on the bracket.
VCDS adaptation procedure to be added shortly
This can end up being a very expensive job at the dealer. Many say this is a dash out job. This guide disproves that and will show you how to do it less than a couple of hours. Before you start anything, make sure your ventilation is at the coldest setting, and then turn it off (blower at “0”).
Before you rush out and buy a new V68 motor (they are £100+), jump to my post below this and attempt the "pikey fix". All you need is a £3 can of contact cleaner and about 20 minutes.
Replacing the V68 motor and VCDS adaptation
Tools required:
T15 torx screwdriver
Flathead screwdriver
Replacement v68 motor 6q0 907 511 - £103 + VAT
Replacement bracket* 6q0 820 892 - £4.40 + VAT
Junior Hacksaw*
VAG-COM / VCDS
*only needed if you snap the clip of the original bracket. See step 13.
1. First of all, you have to remove the passenger side lower dash. In the passenger footwell, look up and you’ll see this piece of trim that covers the pollen filter housing. Remove the two torx screws and pull the trim piece off.
2. There’s a flexible plastic trim piece in front of the gearbox and immediately under the heater controls.
This simply pulls off.
3. Unscrew the two torx scews.
4. Now, you can pull up the piece of trim surrounding the gear lever. It’s simply clipped in. Grasp it at both sides and pull it upwards and then towards the rear of the car. You don’t need to remove it completely.
5. There are two torx screws that have to be removed. One directly below the heater controls and one which is under the ashtray, or thereabouts.
6. Now, look at the underside of the “shelf” in front of the glovebox. Unscrew the 3 torx screws.
7. The shelf can now be removed completely. Take it out and put it somewhere where it won’t be in the way. With the shelf out of the way, 3 torx screws that secure the bottom of the glovebox are now visible. Unscrew them.
8. Open the glovebox. Unscrew the three torx screws securing the top of the glovebox to the dash. The torx screw in the middle holds the catch for the glovebox door and is slightly longer than the remaining torx screws.
9. The glovebox is still pretty secure. You can’t make it out too well in this pic, but there are wo small slots on either side of the top of the glovebox.
Get a cloth to protect the plastic and use a flat head screwdriver to wedge the glovebox out.
The glovebox can now be removed completely.
10. With the glovebox out of the way, the passenger side footwell vent is visible. Unscrew the single torx screw that secures the vent to the blower assembly. To remove the vent, grasp it at the bottom and rotate the vent clockwise (green arrow) and yank it in the direction of the red arrow. It may feel like you’re about the break it, but you have to put some effort into it. Even with the torx screw removed, it’s still clipped in quite well.
11. With the vent removed, the motor itself is now visible. It’s held in place with a single clip. Unclip it and remove the purple plug at the bottom. It’s a bit fiddly as the wiring is clipped in to the motor housing. There’s no way of explaining how to free the wiring, but if you got this far, you’ll figure it out. Took me a couple of minutes at most.
12. Remove the motor and bracket.
13. The motor can be wedged out of the bracket using a flat head screwdriver. Now, I was a bit of a plonker and managed to snap the clip of the bracket. If you managed to get away without breaking this, ignore this step. However, it is quite easy to break the clip.
If your car had manual air con (climatic), you may have had a small bracket with space for a single motor (strangely, it has no art number printed on it). It appears this bracket has been discontinued and they only produce the bracket which was used in cars with the digital climatronic air con (6q0 820 892). This is twice the size of the other bracket as it also holds in the V168 defrost flap motor.
Original bracket on right, bigger bracket in the centre and motor on the right
Obviously, if you have climatronic, you need the bracket for two motors. Whilst the bigger bracket will also fit cars with climatic, it’s quite fiddly as there’s not much room behind the dash and towards the top, it’s extremely tight with a wiring loom for the blower motor in the way. So, get a hacksaw and do this:
14. Clip your replacement (or "pikey fixed") motor into the bracket. Note the two protrusions on the bracket.
15. Now, note the “double teeth” on the cog as highlighted below.
If we look at the temperature flap itself, you can notice this has “double teeth” as well.
16. The protrusions in the motor bracket (step 14) go in these locating holes found in the blower assembly:
The hole at the top is used for the larger bracket (or non pikeyed one…)
Reattach the purple connector to the motor. Check the orientation, it only fits one way. Now, align the bottom bracket protrusion with the lower hole in the blower assembly and use this as a lever, pushing towards the firewall and the other protrusion should locate into the top hole.
17. Now, locate the “double teeth” on both the flap and the V68 motor and align them. The flap and motor should then fit snugly into place. In my case, the motor was in the position where the flap is fully closed (coldest setting). This corresponds to the position of the flap without the motor in place. I had to gently pull the flap towards me a little (there’s only a little give, be gentle) and then pushed the cog of the motor on.
This may not be the case for you, but as long as you align the “double teeth”, you’ll be fine.
18. Clip the motor bracket back in and tidy the wiring up, ie, secure it using the clips on the bracket.
VCDS adaptation procedure to be added shortly