Page 1 of 1
How properly remmove rain/light sensor cover
Posted: Tue Aug 08, 2023 6:24 pm
by Le_Combattant
Hey fox !
In october 2022 I had to replace my rain light sensor because of the glass lens fails (glass broke for no reason).
The replacement and coding of the new sensor was straight forward.
However, the removing of the cover was not. Not at all because the part broke in half.
That's why I have to replace my headliner (some other reason).
According to VW you just have to carefully unclip cover "2" first.
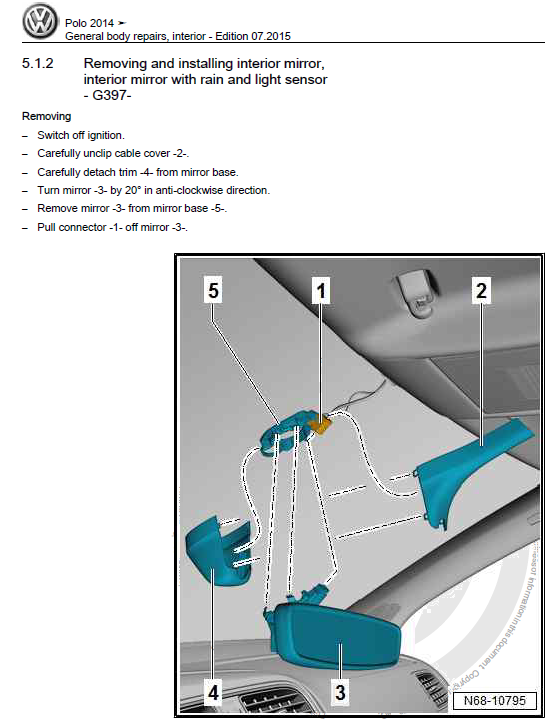
If I'm correct, I tried everything. I tried to unclip the cover "2" attached to the top (broken part) and the bottom (attached to the interior mirror) and nothing.
By pulling to hard, the part mounted on the headliner broke in two part.
Do you have any tips about this part ?
Re: How properly remmove rain/light sensor cover
Posted: Tue Aug 08, 2023 7:52 pm
by ciclo
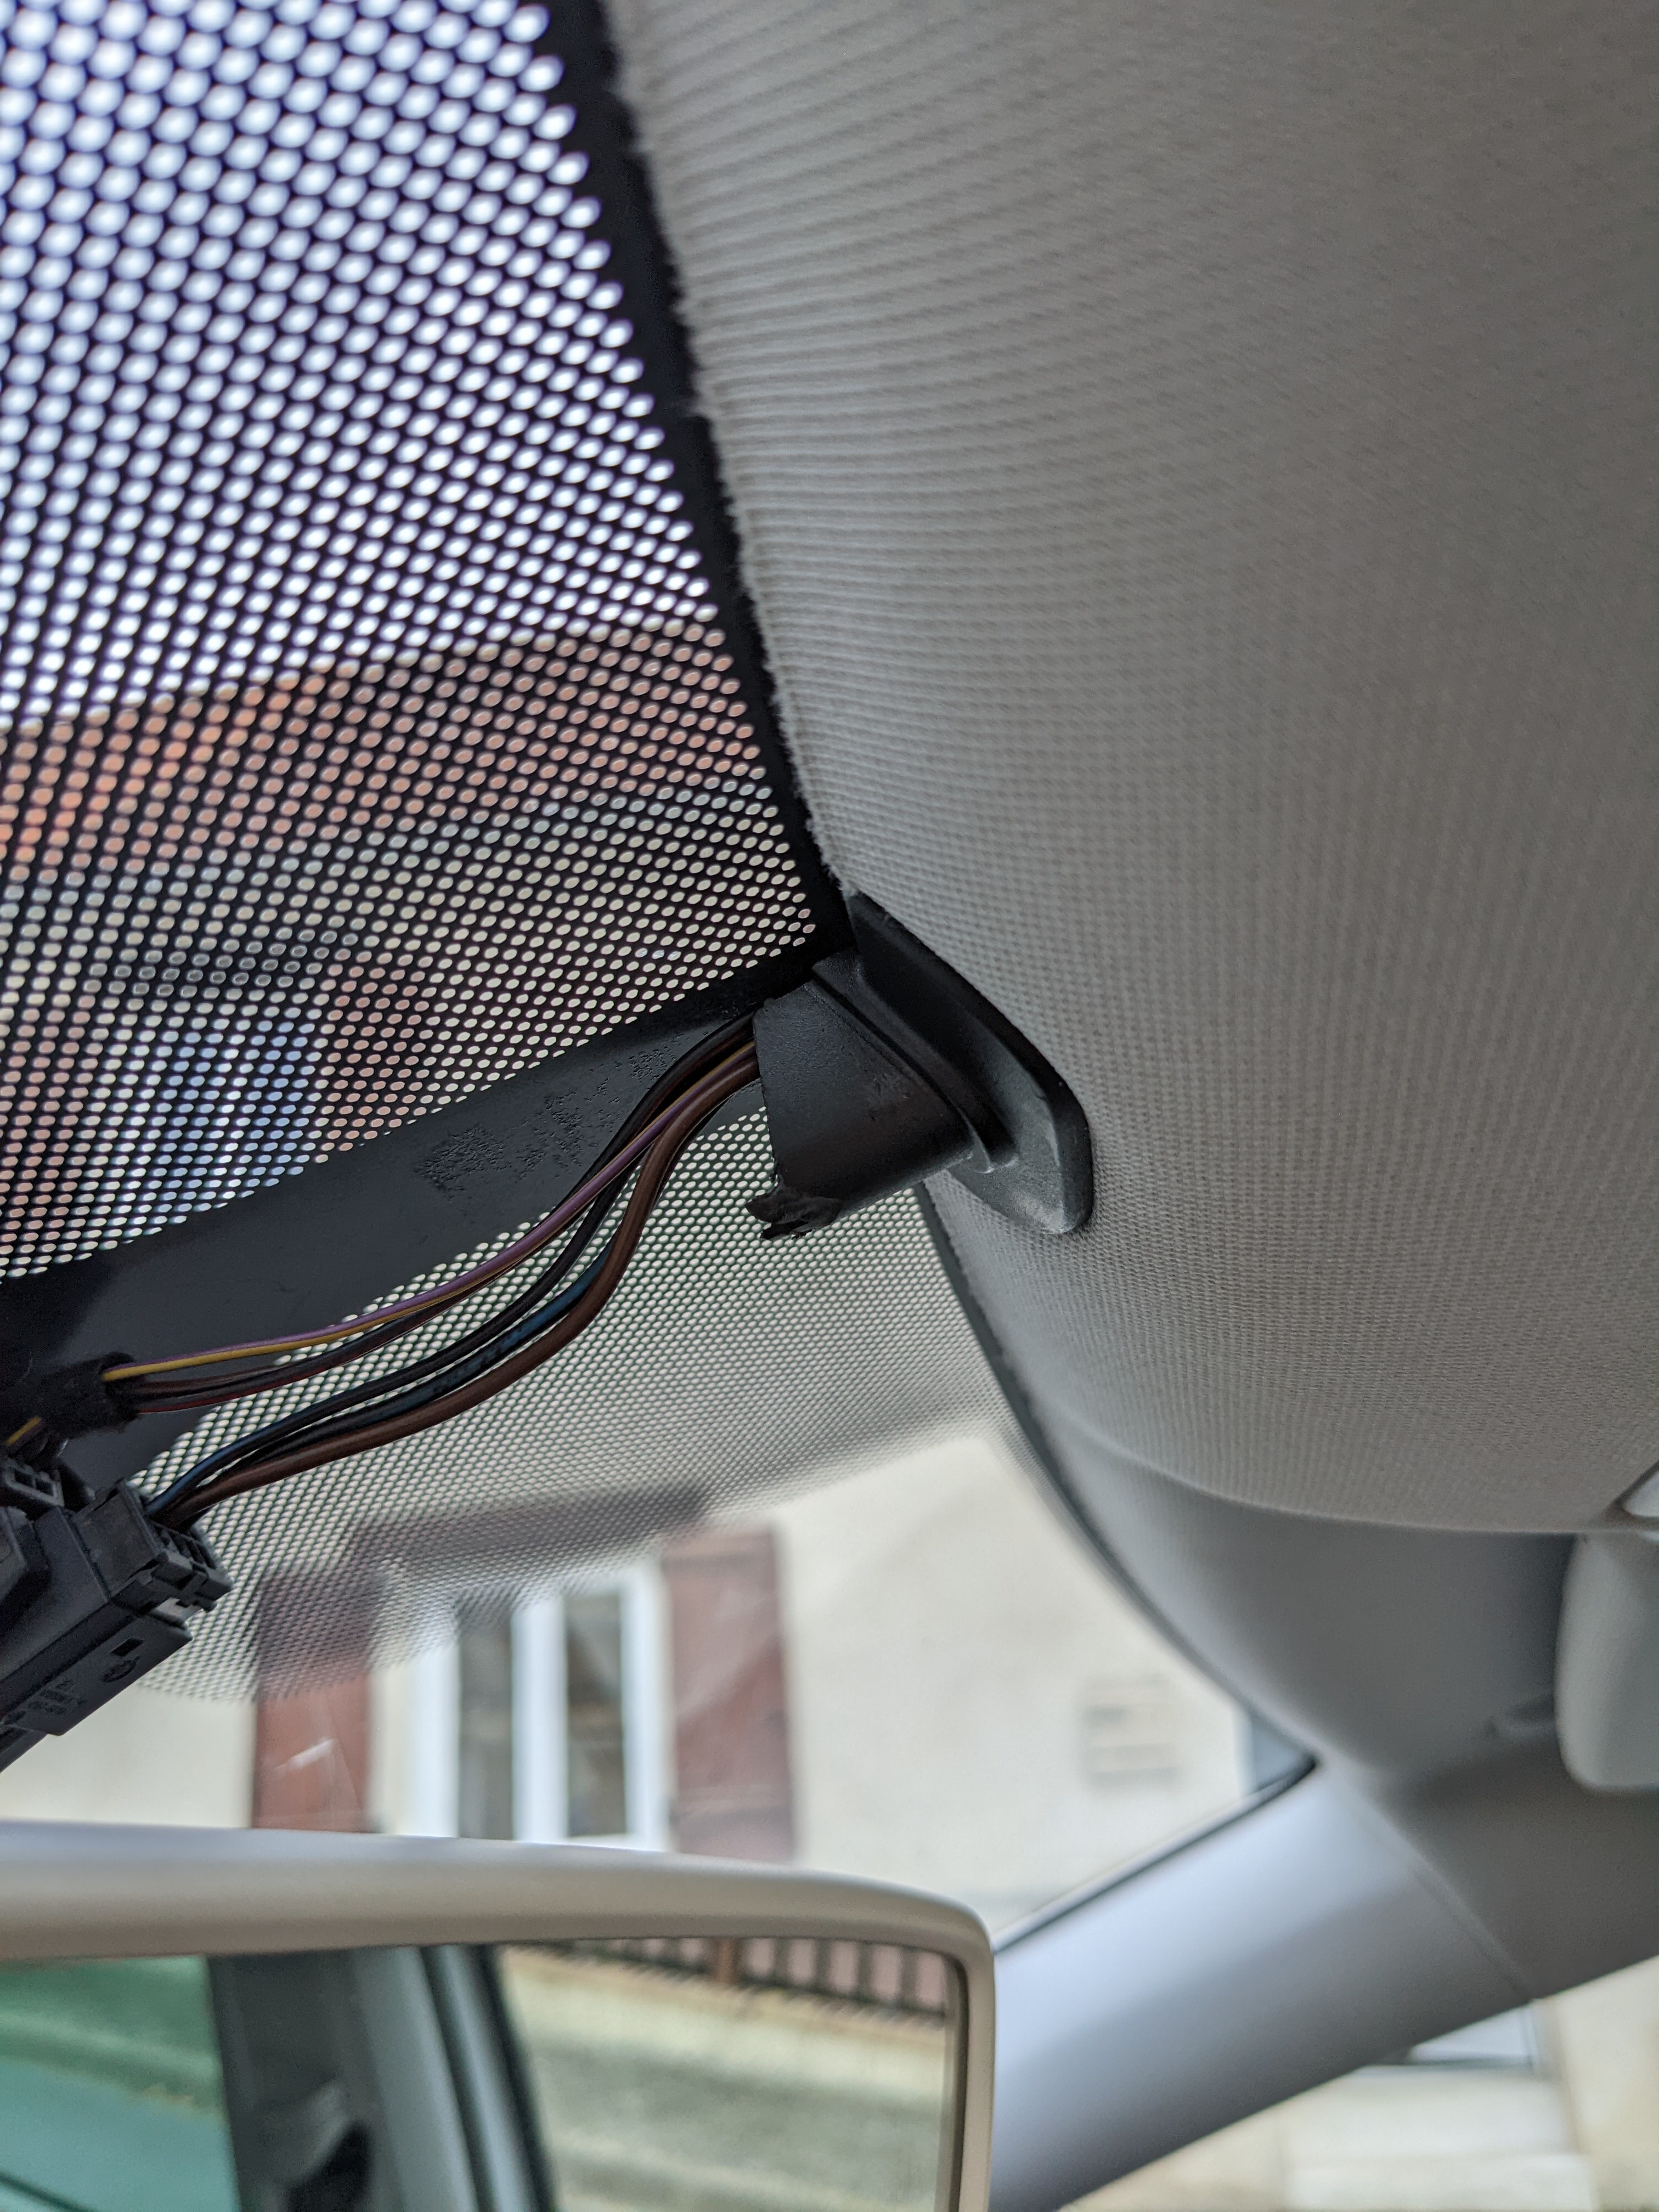
Try to introduce a 'thin and elastic' plastic tool between 4 and 2, at the same time press/push slightly with your fingers on part 2 where the four tabs for fastening are located.
First the tabs on one side without removing the part, then the other side to remove the part. Sometimes one side is easier than the other, try alternately.
It is quite likely that the elastic limit or hardness of the plastic parts will be exceeded and they will be damaged/marked somewhere.
As usual, with experience it is less likely, but it is not a guarantee not to damage the parts.
In any case, they are relatively cheap parts and it is better to replace/renew them if they are damaged... to avoid unnecessary noise.
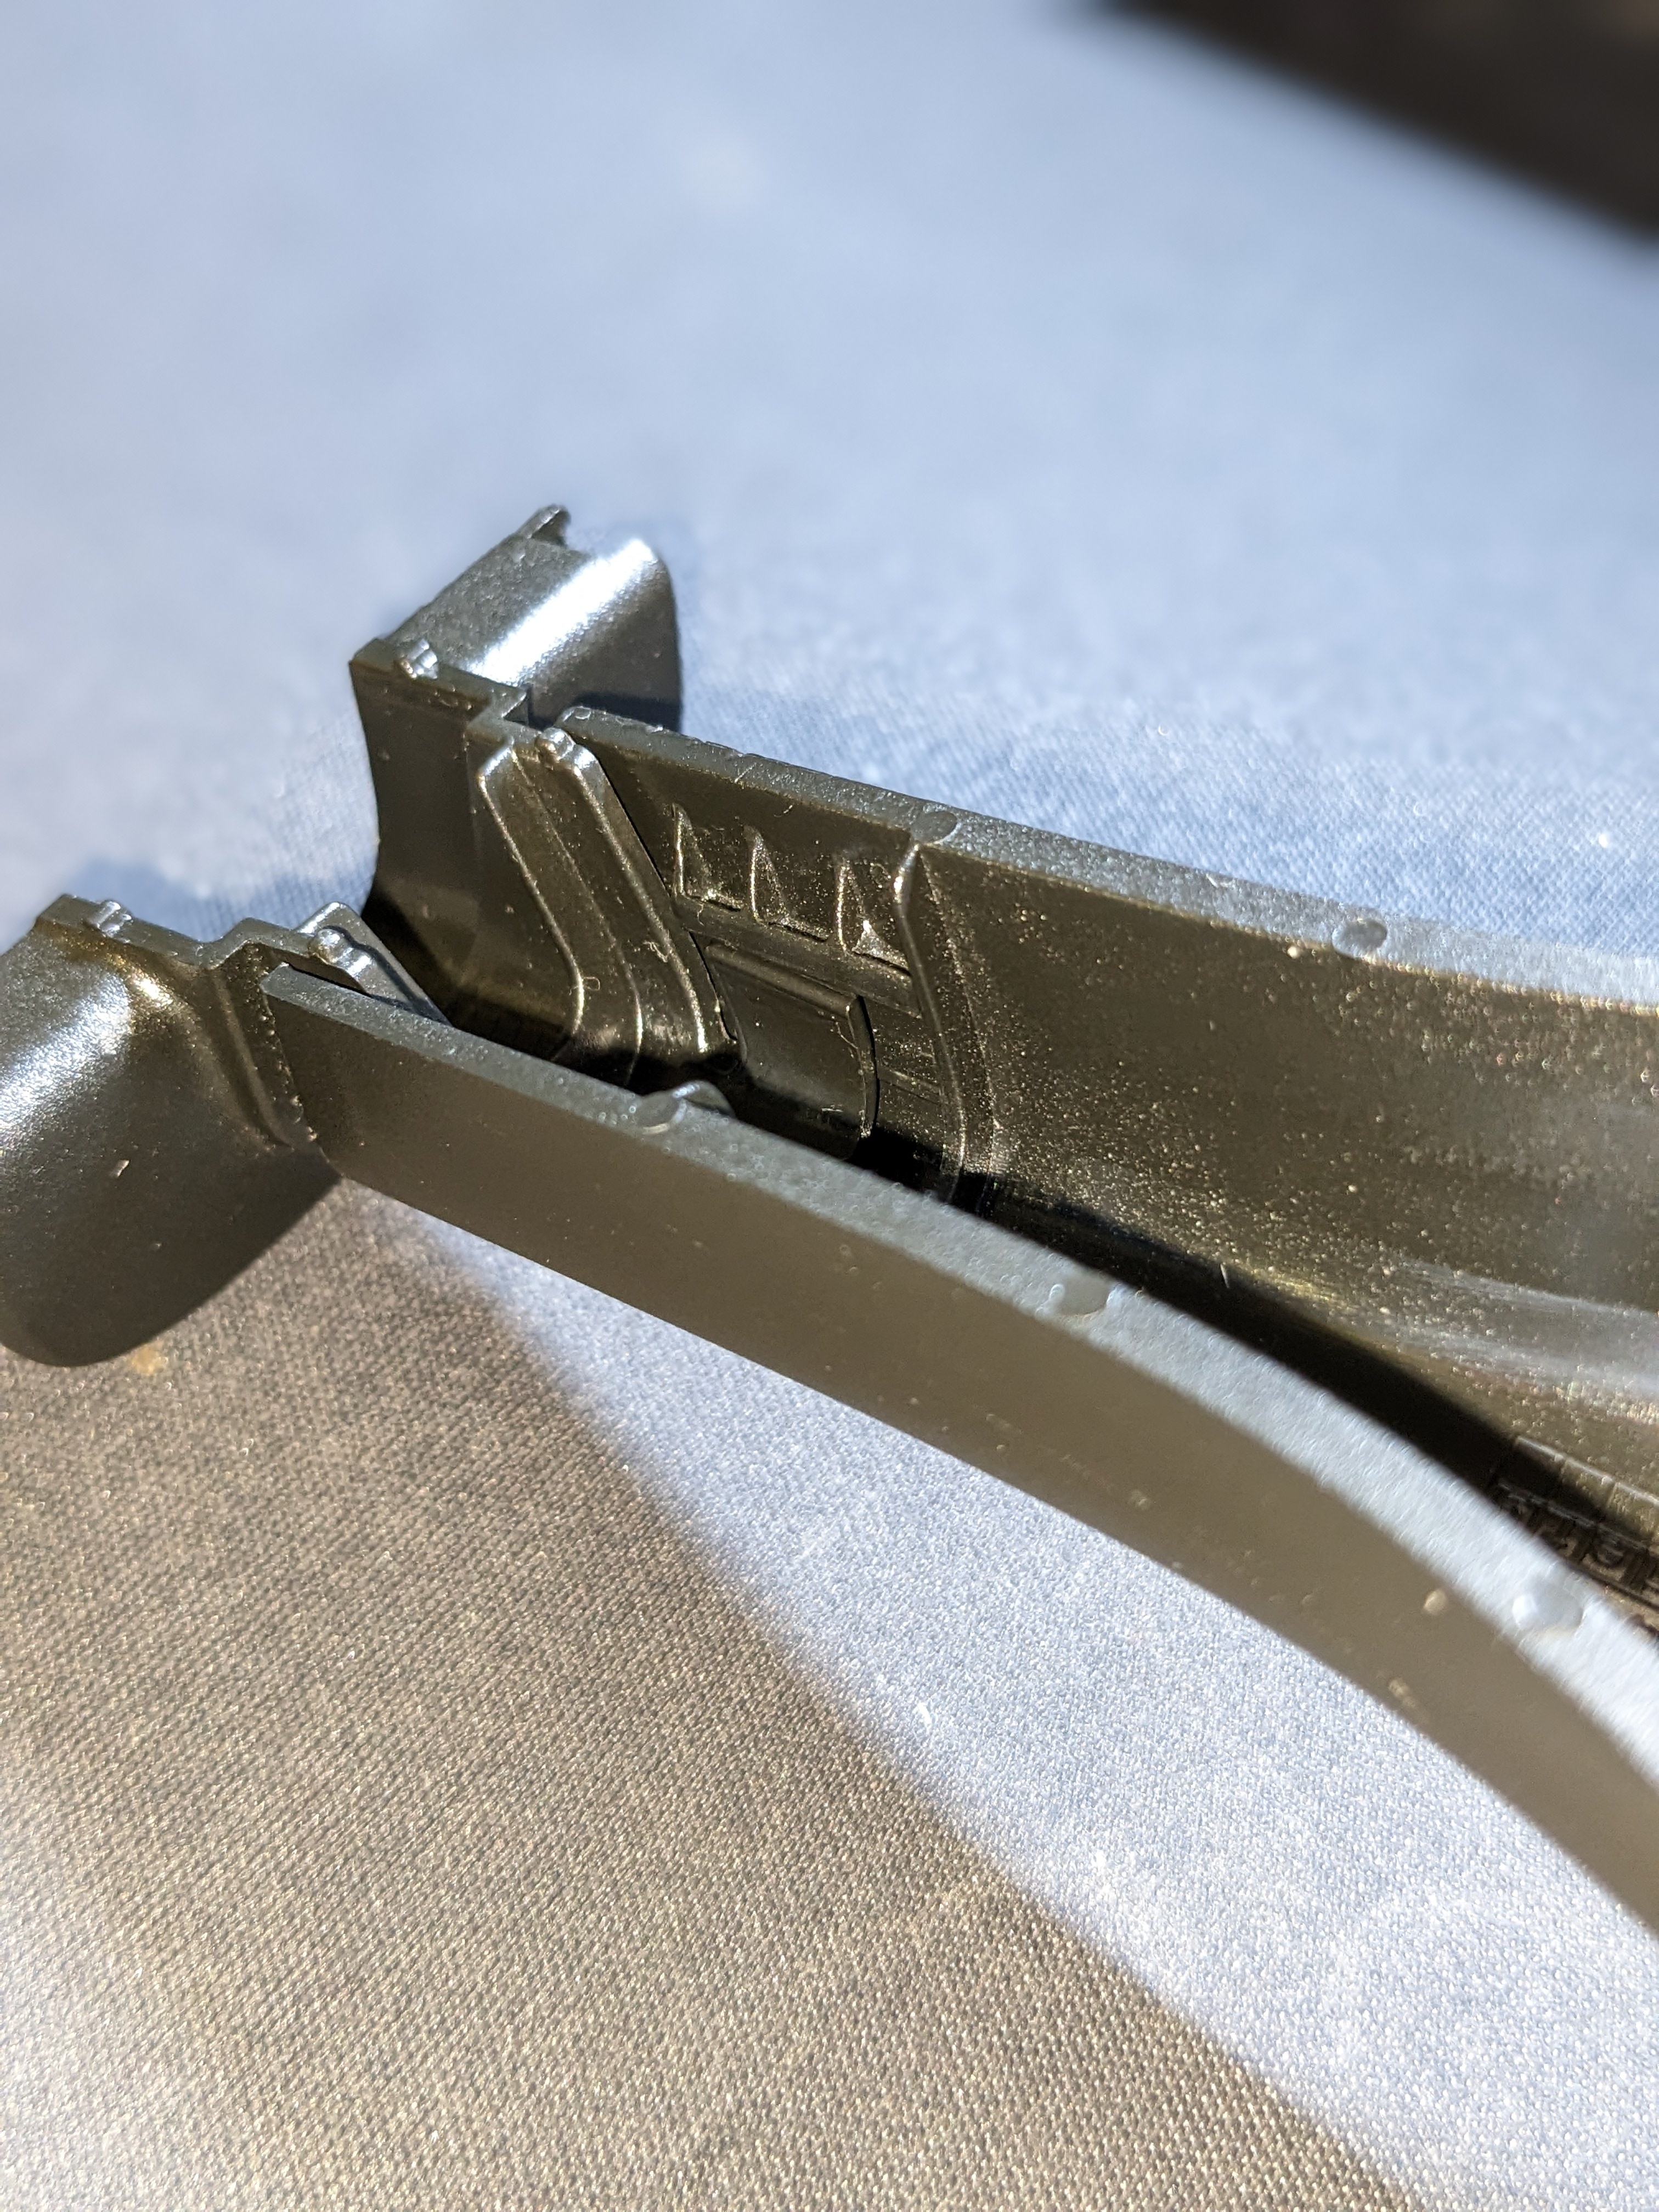
In this image you can see the type of plastic tool to which I refer.

If you zoom in on the image you will see that what is damaged is the edge of the tool due to the low hardness of the plastic.
The part that you show in the image is removed by sliding it forward or opening it, it is held by small tabs.
If you have the dome lights removed you can push the other part.
Re: How properly remmove rain/light sensor cover
Posted: Tue Aug 08, 2023 8:41 pm
by Le_Combattant
ciclo wrote: Tue Aug 08, 2023 7:52 pm
Try to introduce a 'thin and elastic' plastic tool between 4 and 2, at the same time press/push slightly with your fingers on part 2 where the four tabs for fastening are located.
First the tabs on one side without removing the part, then the other side to remove the part. Sometimes one side is easier than the other, try alternately.
It is quite likely that the elastic limit or hardness of the plastic parts will be exceeded and they will be damaged/marked somewhere.
As usual, with experience it is less likely, but it is not a guarantee not to damage the parts.
In any case, they are relatively cheap parts and it is better to replace/renew them if they are damaged... to avoid unnecessary noise.
In this image you can see the type of plastic tool to which I refer.
If you zoom in on the image you will see that what is damaged is the edge of the tool due to the low hardness of the plastic.
The part that you show in the image is removed by sliding it forward or opening it, it is held by small tabs.
If you have the dome lights removed you can push the other part.
Thanks for the tips.
I broke it when I didn't have any trim tool.
Removing the part "2" from the part "4" is the easiest part.
No, the worst part is removing the part '2" from the part that is installed on the headliner (the part I broke).
Here are the parts involved:
From the left to the right
-Part attached to headlined
-Part "2"
-Part "4"
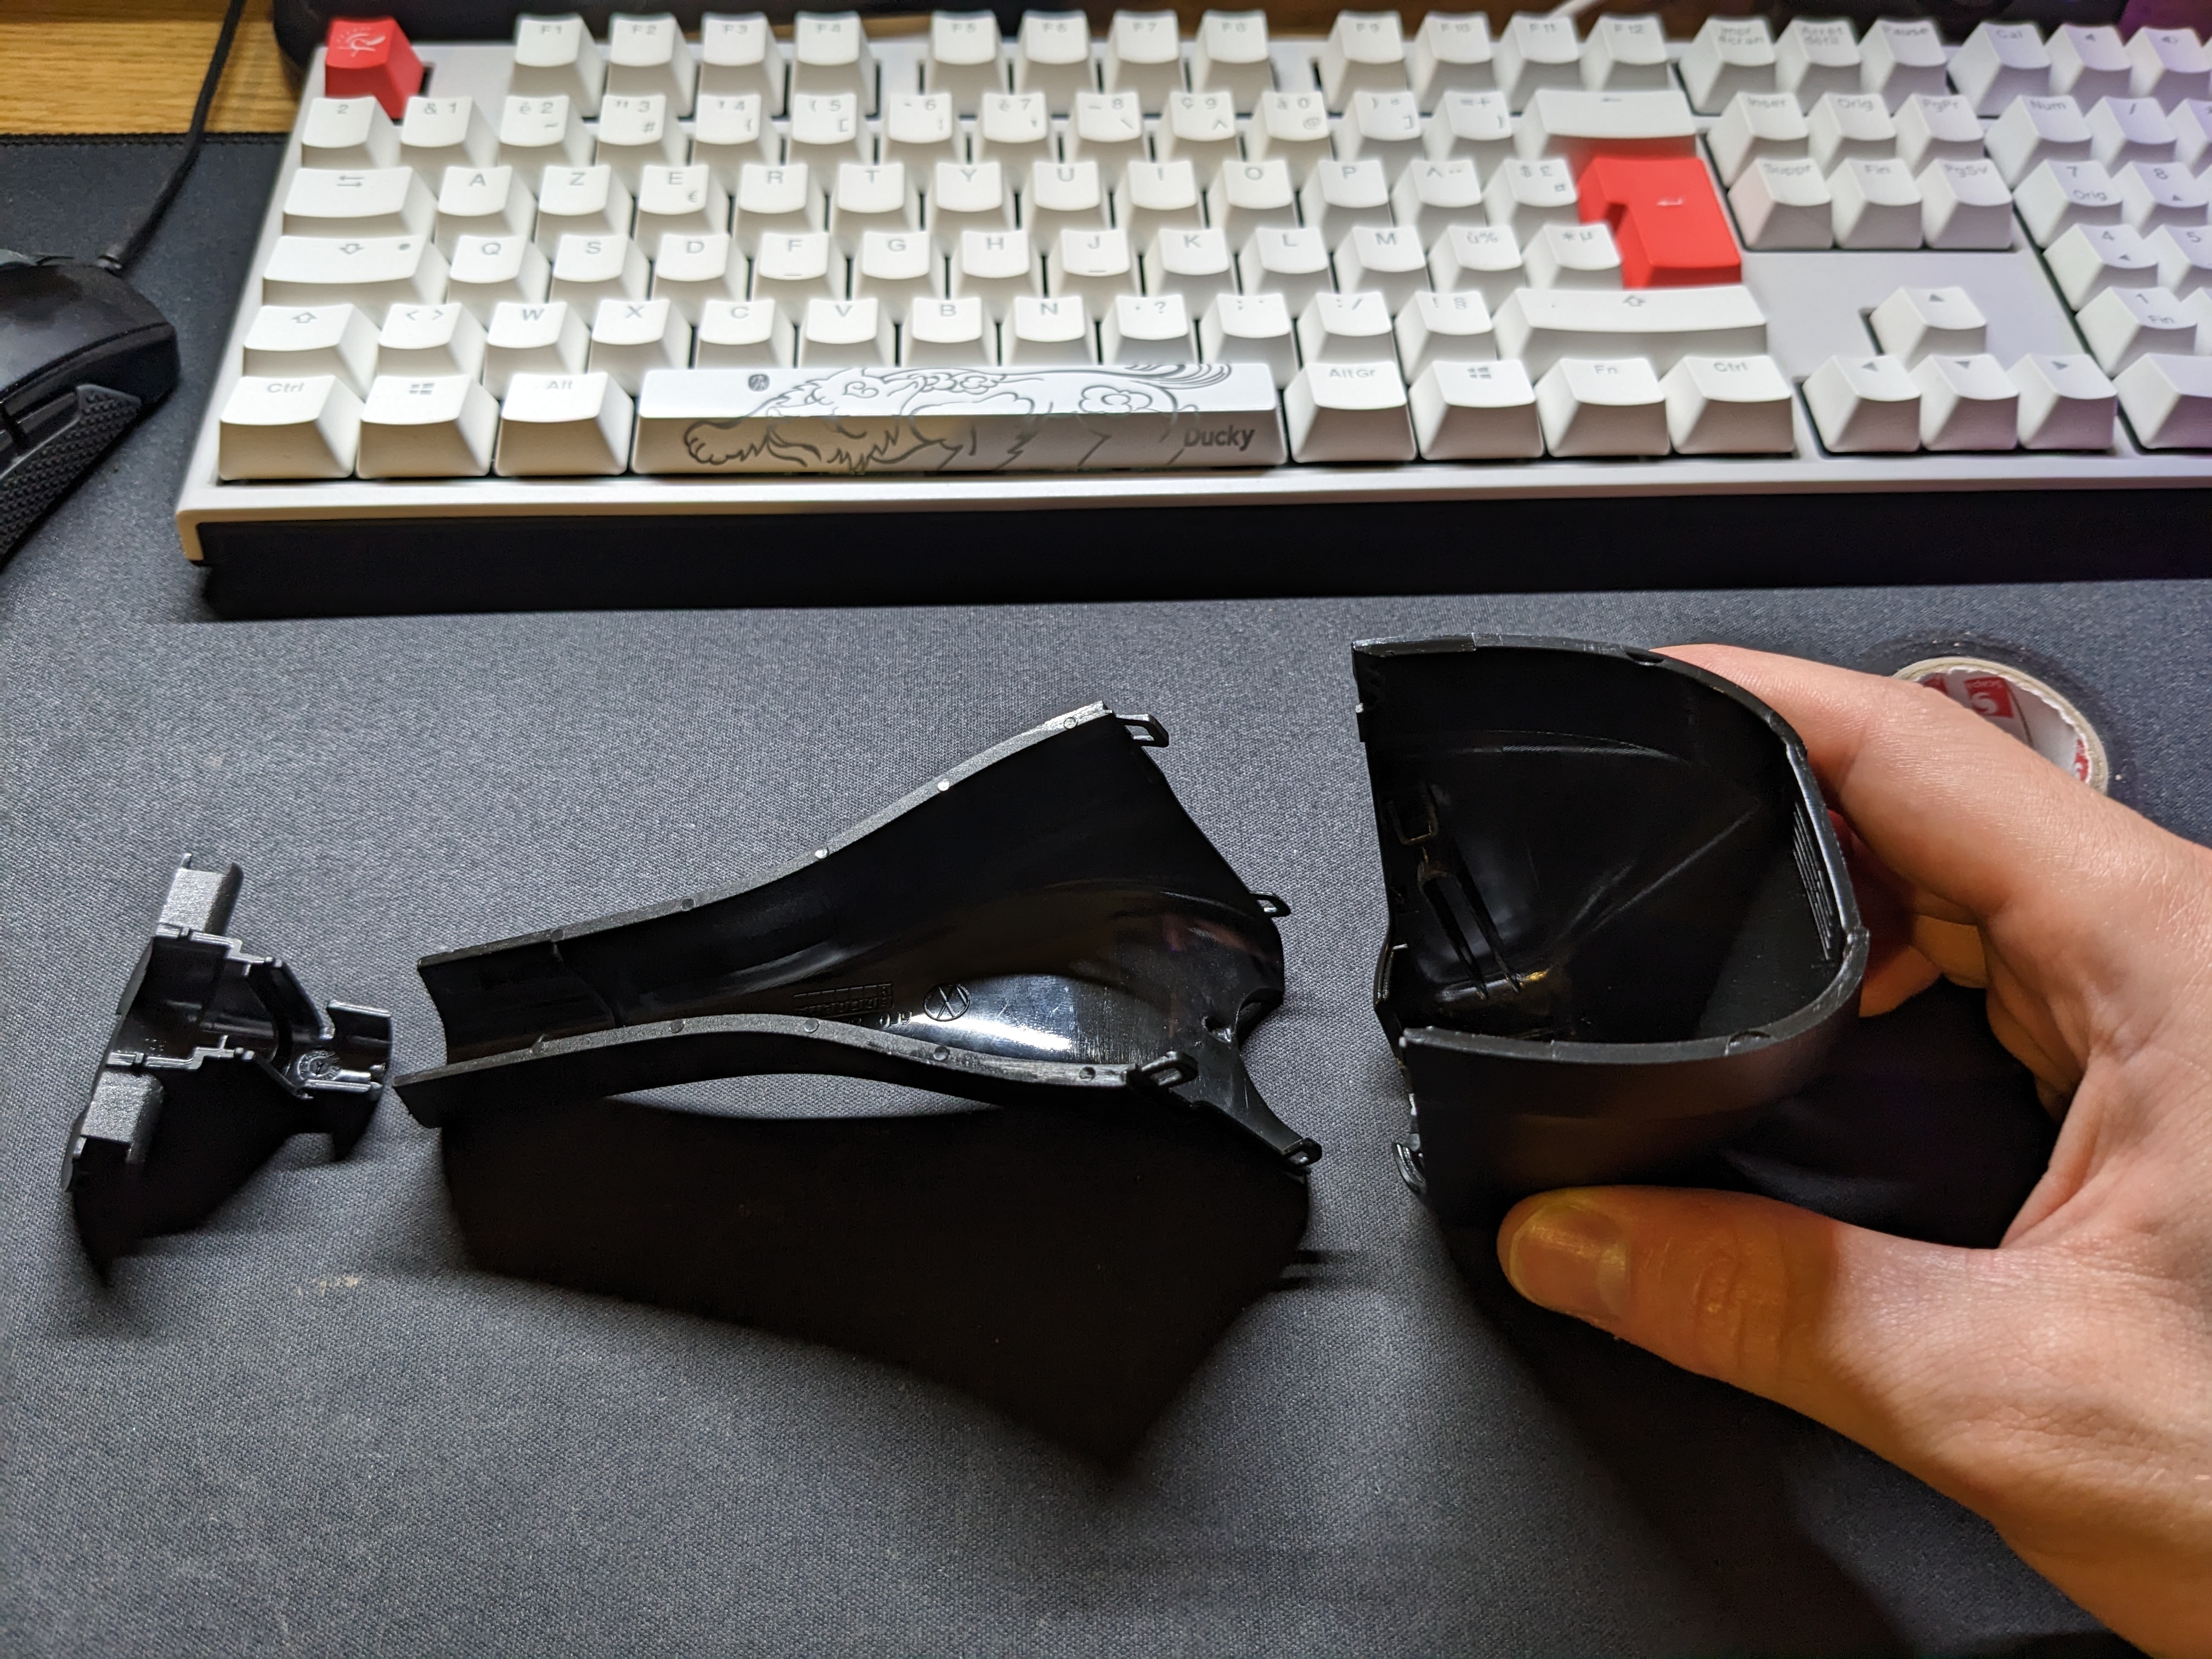
- PXL_20230808_193306789.jpg (3.16 MiB) Viewed 2064 times
To remove part "2" I have to unclip it from the part "4" had I said before: very easy.
The most complicated part is here:

The part "2" is clipped to the part that is installed to headliner.
This is the worst part because the plastic used on part 2 is really, really strong. And I can't slide the part 2 out because it's to tight
Re: How properly remmove rain/light sensor cover
Posted: Tue Aug 08, 2023 9:28 pm
by ciclo
Re: How properly remmove rain/light sensor cover
Posted: Wed Aug 09, 2023 6:07 am
by Le_Combattant
Thank you for the video, I really appreciated.
But I think I went wrong about my explanation.
On your video, you slide out the two parts. It's okey if you have the space.
In my case, I can not because of the part "4" at the bottom and the part installed on headliner.
Part 2 is trapped between those two, and can't go down because of the mirror.
Re: How properly remmove rain/light sensor cover
Posted: Wed Aug 09, 2023 9:46 am
by ciclo
Remove part 4 and rotate/turn the mirror as indicated to remove it, so you get the clearance/room you need to remove part 2.
For the broken/stuck part, if you blow hot air with a hair dryer at medium power, the broken part might slide down from the part installed on headliner.

Re: How properly remmove rain/light sensor cover
Posted: Wed Aug 09, 2023 10:27 am
by amer6R
fix it with noodles and super glue

Re: How properly remmove rain/light sensor cover
Posted: Wed Aug 09, 2023 12:35 pm
by ciclo

(needles)


