Edit
Reason: the videos are already available above.
Thanks ciclo for posting the Youtube videos.ciclo wrote:
Thanks a lot for the kind words, Patilpatil wrote: Thanks for the videos graaja
Outstanding output with clean cutoff. Nice and cool add on features. I must say, with the kind of money spent.. you will get what you pay for
Don't you think the cutoff is bit high in low beam for on coming traffic? What is the color temperature?
Hi graaja,firegrafik,graaja wrote:Ah. I got lucky with the firewall I guessfiregrafik wrote: That hole is free only with automatic transmission. With manual transmission there is clutch pedal with clutch cylinder. And to route the wire you should find another hole.
Hi Aneel,aneelr wrote:Hi Graaja,
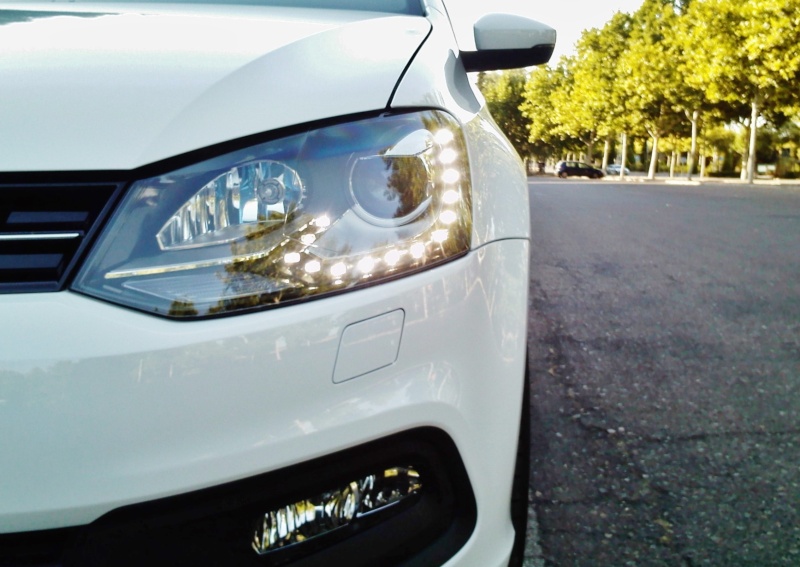
Fantastic DIY on the BiXenon's, i've followed your thread both on this forum and team-bhp. I've a small question, I've also got the same BiXenon's fixed on my Dec-2016 purchased GT-TSI. (mine was not a DIY, but I had taken my vehicle to Vagtunes, Kochi and got it fixed there). My query is , there is a considerable amount of gap between the lower part of the head light and the bumper. (refer some of your image below)
Have you noticed it?? Is there a fix for it??
I'll post a reference from my car also later, right now I do not have a pic.
Thanks,
Aneel.
The cornering light function is similar to the stalk version. But there is no individual turn on/off as in case of your setup. My Headlight level-ing is also working as stalk.graaja wrote: 1. How have VAGTune wired the cornering light function? Does it work as cornering light?
The DRL's are connected the the Auto-Switch, which replaces the stalk headlight switch. And it does not turn on, when in off state.graaja wrote: 2. How have they wired the DRLs? Do your DRLs turn on when the headlight switch is in Off position?
Hi ciclo,
Hi antardaksh04antardaksh04 wrote:
Hi ciclo, ...
Hi ciclo,ciclo wrote: Hi antardaksh04
Hi graaja,graaja wrote: [*]Route the DRL and parking light signals from headlight through firewall

I took the -ve terminal from a bolt inside the engine bay. From your picture, I think it is #2.antardaksh04 wrote:Hi graaja,graaja wrote: [*]Route the DRL and parking light signals from headlight through firewall
Would you be able to tell the location from where you tapped negative terminal for DRL/Foglight wiring. Was it underneath dashboard or within engine bay.
Following diagram has location of earth points.
I have got socket for DRL (next to fog light) and have to prepare wiring harness. It would be good to know the OEM way to prepare wiring.
I will modify length of negative wire accordingly.
Regards.
